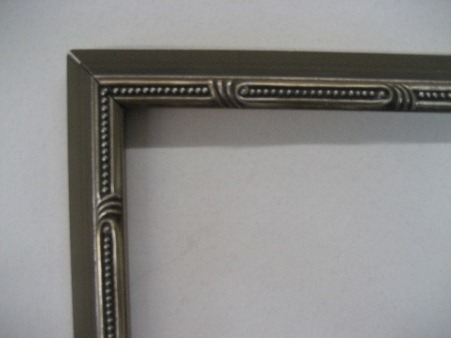
The emphasis, when framing a photo or a piece of art, is to highlight and draw the eyes of the viewer towards the focal point of the piece. A frame isn’t there to distract or serve as a draw in its own right – its job is that of the subsidiary.
But when regular frames, even the most Spartan, are still too much, we often point our clients in the direction of the block mount. Moulded to a wooden or cork frame, a block mounted photo provides the ultimate in minimalism.
Photos can be printed and mounted on a variety of different styles of blocks, but picture framing in Sydney typically focuses on fibre boards. They need not be extremely hard-wearing or toughened, as they will usually reside indoors. And the fibre board is also easier on the backing wall.
The lack of a frame, and the resulting lack of an edge, offers a unique flat perspective to the photo in question. It reduces any issues of glare, light reflecting off the glass in a typical frame.
Block mounted photos, and their flat, one-piece construction, allows not only for easy, multi-angle viewing, usable in a variety of lighting conditions – they are also ideal for those of us who might move frequently, or who need a hard-wearing photo options for those areas that might be jarred more often. They are capable of retaining their strength over time, and have been among the longest-lasting photo framing or mounting options to be found anywhere.
For more information on the unique block framing method employed by your local experts at Amarisco, or to get tips on your framing projects, contact us today! As Sydney’s framing experts, we are always keen to discuss our craft.
Framing pictures for our Sydney clients involves a balancing act of different factors and variables, many more than many people realise. We strive to be the best in our field, and this has led us to incorporate more and more details in to our choices of frames for the photos, and memorabilia, that wind up at our door. Here are some of the questions we ask ourselves before choosing a frame.
What shape is your photo in?
Frames aren’t just mean to serve as highlights – they also serve to protect vulnerable photos and memorabilia from the ravages of time, sunlight, dust, and wear. To frame a photo is to memorialise a moment, and that moment must be lasting within the frame. If a precious photo is showing signs of wear, we will choose a frame that prioritises its protection – without, of course, sacrificing the aesthetic.
Placement
Museum art pieces exist in a well-regulated environment, one that ensures humidity and UV levels are not at a level high enough to damage the painting – while ensuring that the colours are still displayed vividly and well. If your piece is being hung in a vulnerable spot, we must take steps to ensure that its environment within the frame will preserve it.
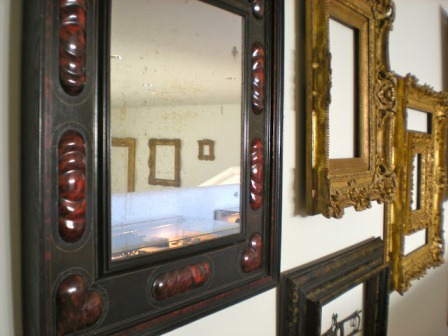
To what period does it relate?
Particularly in the context of fine art and paintings, it helps to match up the intended period of the painting with the frame. A watercolour in the spirit of the romantic period will look odd in an ultra-modern alloy frame, while a modern art piece will not suit an opaque and broad wooden frame.
Picture framing in Sydney is a complex affair, and this is just a sample of what we must consider before putting your piece behind glass. For more information, contact us today.
Framing your sport memorabilia is an ideal method of preserving memories in their pristine state. In the absence of such fine treatment, jerseys and other articles can lose their appeal, their good condition, or worse, become lost in the shuffle.
Framers have long made a habit of putting unique articles up on the wall, but these frames have often struggled with bulkier items. In the absence of objects that can be laid out flat, frames struggle. This is a pity, as many articles of sport memorabilia are not conducive to this treatment. Luckily, your innovative framers at Amarisco have managed to find a solution.
Our new frames operate almost more like a display case hanging on your wall. With proper support and pegging for your article, these pieces can now be displayed in all their three-dimensional glory, in striking, deep frames.
Such articles that have received this treatment include such things as racing goggles, hats, caps, and sculptures, but there is almost no limit on the extent to which this practice expands the potential for bits and pieces to become a stylish part of your wall.
Best yet are the display capabilities offered by these cases. With the deeper cases come the opportunities to augment the lighting and shade elements of the display. With proper lighting, the object casts its shadow down on to the backdrop, and adds a view that augments the look and shape of the piece.
With this broader range of possibilities, we at Amarisco can take care of your favourite sports memorabilia, with a new method of framing and protecting it. We can ensure that your fondest memories are preserved for years to come.
When you have invested the time and cash by framing a piece of coveted art, a picture, or sports memorabilia, you will want it’s attributes to be on full display in your home. It wouldn’t do to have it languishing in a disused corner of your home, or accompanying art of a different motif. Your choice of location can be vital in how this piece is viewed within your castle.
As with real estate, so too does location play a huge role in the placement of your framed photo or memorabilia. The viewing distance must be able to take in the entirety of the piece, while details need both a long and short viewing distances to be properly appreciated.
Along with this, the lighting in the area of your piece must properly reflect the colours, and the detail, of the piece. It must be well-enough illuminated to grasp the intricacies of the piece. However, direct sunlight, and even indirect reflected light, can fade your coveted piece, even behind the best of frames. It pays to place them where they will not be exposed directly.
Another option for highlighting your piece is the installation of independent lighting, aimed directly at the piece, in the form of mini spotlights. These can be used only when the piece is desired to be seen, and can be turned off – to prevent fading, and save energy – when you are not around.
At Amarisco, we can advise you on dozens on methods of taking care of whatever you have being a frame. We can protect and enrich your piece, protecting it while highlighting its best features. We are Sydney’s sports memorabilia and picture framing experts, and we’re always up for a chat. Contact us today!!
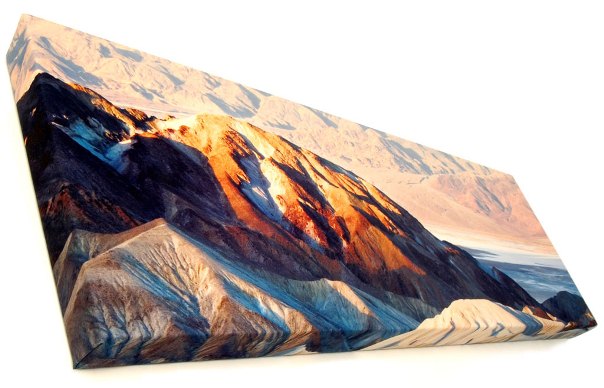
Unframed paintings hardly look good from the side. Anyone who paints or visits art galleries has probably noticed that the raw canvas edges look shockingly white against the colourful, painted front. It looks even worse when bits of the colours get on the sides of the canvas during the painting process. It creates a design which is jarring against the painted front.
The canvas sides and edges hardly mattered in the past, but framed paintings are in vogue these days as framing not only compliments a painting but also adds a layer of superiority. This is where canvas stretching comes in.
Stretching a canvas is important as the process helps preserve the canvas and prepare it for framing. Canvas stretching is the process of preparing the surface (made of either cotton or linen fabric) by stretching it around a wooden frame. It is usually secured on the back, though some prefer to secure it on the sides, using staples, a metal spline or tacks. Finally, the canvas is primed with an oil based primer or acrylic gesso and it is ready to use.
Types of Stretched Canvas
Traditional Wrap: The painting/image must fit 3/4 of an inch wood stretcher bars so that the canvas can be easily installed in a frame. If you are using a traditional wrap, it is recommended to frame your painting/image as there will be unpainted edges and staples visible from the side. Framing is therefore essential to cover them.
Gallery Wrap: This type of stretched canvas is ready to hang. The canvas wraps around the bars, therefore the staples are placed on the back and hidden. The sides too are completely painted. It comes with a wire on the back, making them ready to hang as soon as you receive the new painting. Framing is not required with a gallery wrap.
Options for Stretching Canvas
Outsource
Stretching canvas needs proper skills so that the surface is free of wrinkles. If you are not familiar with the process, it is recommended to seek professional help to stretch your canvas prints. The frame shops have trained professionals to create the optimal visual impact. These shops offer canvas stretching services for new and previously stretched artworks.
The biggest advantage of outsourcing this task is that you are guaranteed a high standard, professional stretching job. Stretching canvas involves a lot of hassles and is often challenging for an amateur. Just drop off your canvas prints at a frame shop and the professionals there will take care of the rest. The next time you see your canvas artworks, it will be ready to hang.
With a professional offer canvas stretching service, you don’t need to bother about the size as these framers have necessary tools and equipment to stretch any roll you bring in. Time delay is often a problem with many frame shops. It is therefore recommended to ensure that your framer has the reputation of finishing stretching job on-time.
Also, opt for an experienced framer who can create the look you are after. One big challenge of outsourcing canvas stretching is that it is expensive. The cost depends on the thickness of the stretcher bar and the size of your image. However, outsourcing is still a cost-effective way considering the high standard stretching job you will receive.
2. Stretcher Bar Sticks
Don’t consider this option unless you own a full blown production studio where you need tons of stretched canvas every day. This process require 10-12′ stretcher bar sticks, a saw and an underpinner or joining machine. First cut down the sticks to required size and then join the bars using the underpinner to make the stretcher frame.
This process can significantly lower your cost, depending on the quality of wood you use. There will be no time delay as the entire manufacturing process is in your hands. This further provides you the ultimate flexibility with the canvas stretching process. You can even create custom-tailored and unique stretcher bars by providing a design profile to the wood supplier.
On the downside, using stretcher bar sticks needs skilled labour. You need to appoint trained and experienced employees and proper management is required. In addition, you need to make good investments in equipment. Stretcher bar sticks are only recommended for those who have huge volume of requisites for stretcher canvas prints.
3. Pre-Notched Stretcher Bars
If you’re familiar with the process of canvas stretching, you can do it on your own. You will, however, need certain tools for that such as a staple gun and stretching pliers. Besides, you need to have enough patience to stretch the canvas by hand. You can even use pre-notched stretcher bars to further lower your cost, provided you know the traditional technique of stretching a canvas print.
Several wood options are available with pre-notched stretcher bars. While the fir wood bars are the least expensive options, those made of pine wood are more expensive. The advantage of using pre-notched stretcher bars is that you can have complete control over the stretching process. Since the fir wood bars are inexpensive, you can considerable lower your cost by using them. Better yet, you don’t need to have underpinner, saw or any other professional equipment to work with them.
However, the biggest catch of using pre-notched stretcher bars is that you must have the technical skill of stretching canvas. You will further need certain professional equipment, for example, a canvas stretching machine otherwise it will take a lot of time and effort to stretch a print. And buying professional stretching equipment will raise the cost, making outsourcing a cheaper and cost-effective solution.
Lastly, pre-notched stretcher bars come in fixed sizes. You will therefore need specific sized bars and adjust your print accordingly.
How to Stretch Canvas – The Basic Steps
Buy rolls or pre-cut, un-primed canvas
Measure how much canvas you will need
Lay the stretcher bar frame on your canvas (face down)
Fold up each edge. There must be plenty of canvas overlapping on the bar
Cut out the piece in appropriate size using a scissor
Fold the canvas over your stretcher bar, taking one side at a time and start stapling them using your staple gun
Now spin the canvas to staple the opposite side, pulling as much canvas towards you as you can
Repeat the same process for the remaining two sides
Remember that the centre of the canvas is tight
Now grab, pull, and staple along the bar with staples running down each side until you reach the corners
Finally, grab the canvas corner and pull it nice and tight, turning it on its side so that the canvas lay flat and staple it
One edge of the canvas must have a 45 degree folded line, while the other edge should have no fold at all
Repeat this process for all corners.
Conclusion
Though stretching canvas sounds an easy task to do, it involves a lot of measurements and special skills. You can start stretching your own canvas, provided you have the required skills and equipment. But remember that it might not have the high standard and professional touch to compliment your artwork.
While making your own frames at home may seem like an easy thing to do, many a time, it isn’t. It is easy for things to go haywire, which only leaves behind a mess and thoughts about what could have been. That’s why it is best to leave certain jobs to the professionals.
We all want our art work to look gorgeous and stand out. We want it to razzle and dazzle, and capture the fancy of the audiences. However, your art work alone may not be able to do so every time. Sometimes, a little help goes a long way in influencing the audience to succumb to the work’s charm.
A professional framing service is your best bet when you need to get a painting framed. But that’s not all that professional framers are for. The post lists a few facilities that a professional framing service can provide in addition to treating your artwork with the utmost care while framing it.
1. Determining the Structure
Typically, this step is given a miss as when you paint on a canvas or on a board, you tend to adjust its size in accordance with the shape of the canvas. However, if you paint on a normal sheet of paper, you may be left with extra paper around the edges which may need to be cropped. This is where the professional framer can help you.
A good framer will take some mounting board and talk to you about the parts of the painting that need to be trimmed off. Once that’s taken care of, the framer will make a few markings to mark the four corners to denote where the frames will go.
It makes sense to listen to the suggestions of the framers about this aspect as they’re experienced in this and have a sound idea of determining a suitable structure accurately. If you disagree with his suggestions, you can move the mount in different angles and see what the art work looks like. Whatever you decide will ultimately prevail.
2. Figuring Out the Mount
In case you’re wondering what mounts are, they are pieces of colored cards that are placed around the paintings before they are framed. In the USA, however, these cards are called mats and the backing board is called a mount.
Paintings may or may not have a mount, and the frame may embrace the edges of the paintings. But having a mount is preferable as it can help bring out the colors and enhance the overall appearance of the paintings. They may have multiple mounts, often with only a bit of the one complementing the painting showing.
Ask your framer for mount options and he will show you a range of samples in a variety of colors. He will also have a display board over which your painting will be fastened to make it easy for you to pick the right mount color. In doing so, you will have to view your painting from a distance to get a better idea of what it will look like once it is mounted.
Professional framers stock up on an assortment of sample corners of frames. These too will be attached to the corners of your art work (aside from the mount board), for you to get a good idea of what it will finally look like.
If you find it difficult to envisage your painting as a fully framed one, use your hands or sheets of paper to cover up the rest of the exposed parts of the painting. That way you will see only the angles decorated with the sample corner.
4. To Go for Glass or Not?
Most framed art prints that we come across have a glass front. While it is important for watercolors, pastels, and drawings to be framed behind glass, it may not be necessary for paintings that are varnished.
Your framer will show you two types of glasses – reflective glass and matte glass (less reflective but absorbs some of the color of the painting) – and ask you to pick between the two. If you’re unable to decide, ask the framer to show you a few samples so you can see the difference and take a call accordingly.
The cost of framing depends on the size of the art work, the number of mounts used, the frame chosen, and whether or not you choose to have glass in it. Your framer may either give you a quote as soon as you select your frame or give you an estimate over the phone. If you’re not happy with his quotation, feel free to try elsewhere.
6. When the Pick-Up Date Is Here
Just as you’re careful with all your purchases, be scrupulous with this one too. Before you pay for the framing, make sure the following are in place:
Does it have a mount board? Has it been cut tidily?
Is the mount flat and correctly placed?
Has the frame been attached properly?
If you find any discrepancies in any of the above aspects, get them rectified before you make the payment. If you like the framer’s workmanship, do let him know about it. A little appreciation for a job well-done never hurt anyone!
Conclusion
All your art prints deserve a place of pride in your home or in the art gallery. Make sure you approach a professional framing service to adorn them with the most attractive and suitable frames, which will not only enhance their splendor, make them the cynosure of all eyes, but also keep them protected. The above points should give you a fair idea of how a professional framer can help you. Do make a note of them and make them work to your advantage.